I first started by adding a UVW Unwrap Modifier to model before the symmetry modifier already applied. Then I selected all of the polygons except around the ear which I can do seperately later. This is because the ear is a very complex shape and is easier to handle on its own.
With the polygons selected I then went into Cylinder mode and positioned the cylinder (shown above) so that it surrounded the head and lined up with the center of the face. This is for calculating where the texture will be applied.
Once that is done I went into edit mode which brought up the editing window seen above. At this stage a checker texture is shown on the model representing the texture flow.
In some areas the texture is stretched. This needs to be fixed otherwise then the actual texture is applied it will also look stretched.
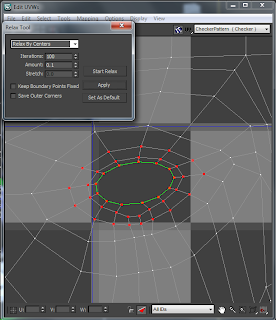
Selecting the vertices where the stretching is occuring and using the relax tool positions the vertices to better prvent stretching. This can be done manually but is acheived faster using this method.
I also used this method on common trouble areas such as the eye:

After some tweaking and some manual movement of vertices the final result looks quite good. The amount of stretching has been greatly reduced.
 |
| This screenshot was taken using the 2012 version of 3DS Max hence the slight difference in colour |


No comments:
Post a Comment